New-to-me: the classic white shirt

This post has already appeared over at the Monthly Stitch, so if you've come here from TMS - Hi, welcome!
The reason I actually took up sewing seriously a few years ago was because of a popover shirt.
I bought a beautiful a RTW silk popover shirt patterned with tiny brown and cream hound's tooth checks. It was not cheap but I loved it - it looked and felt great. Until I wore it, sweated a tiny bit and discovered the fabric under the arms was completely, and permanently stained.
I should have taken it back to the shop, but instead I threw it away sadly and enrolled in my first TAFE sewing class, deciding I was sick of RTW clothes and their shoddy quality - that was three years ago. Four sewing courses later and I have finally made a popover of my very own.
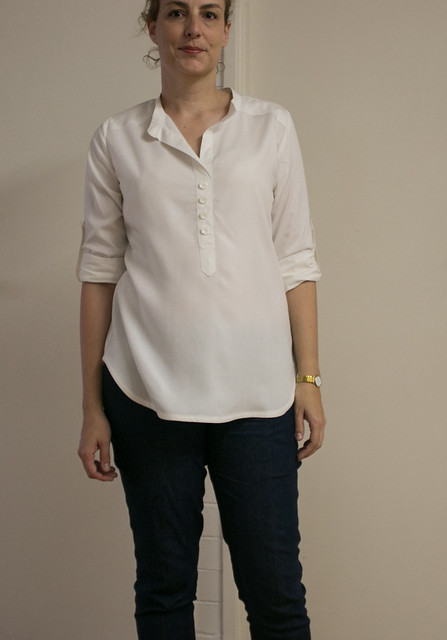
So although it is just plain white shirt I am thrilled with it. I know I will get a lot of wear out of it, both at work and on weekends and I really just like the pared back look of a classic white shirt.
This was made using Itch-to-stitch's Mila shirt pattern. It came out about seven months ago and at that point I hadn't seen any popover shirt patterns, so I snapped it up, thinking it might be a good base for replicating my ill-fated hound's tooth shirt. I then did nothing with the pattern until this challenge prompted me to finally get on with it.
Firstly, this is a lovely pattern to use. It's a layered PDF, the first layered PDF I've used and it was great to be able to print only the size I wanted, without going boggle eyed looking for the correct dotted line. It also comes in A, B, C, D and DD cup sizes and Kennis includes really good instructions for how to print using the layer function and on what pages to print depending on the cup size you want.
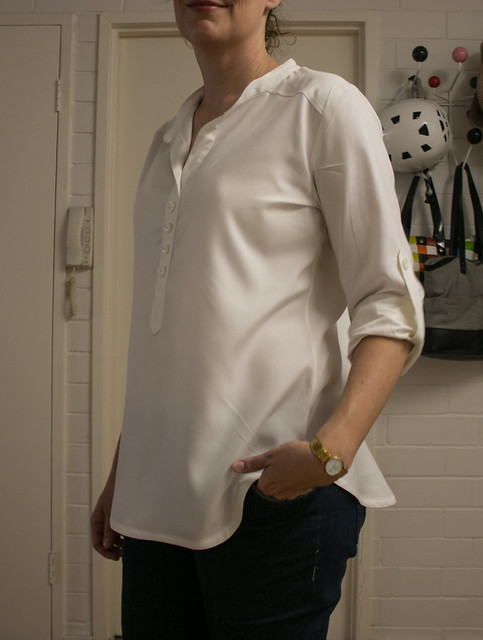
This version is a size 8 with the A cup front piece, and the fabric is a fairly substantial white rayon from Spotlight (Australia), which drapes well but certainly doesn't float. It presses very well, but also creases pretty easily as well.
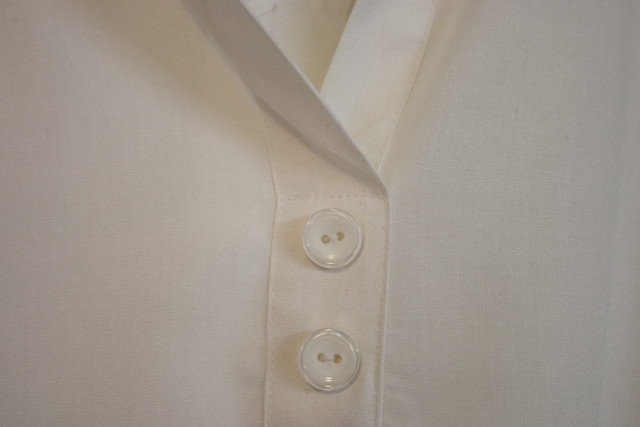
The instruction are, quite simply, excellent. They are very thorough and include diagrams at every single step. They guided me through attaching the collar stand, attaching the yoke burrito-style and most importantly, sewing the tower placket at the front. I had never sewn a placket like this before and following all the instructions it all went without a hitch.
What I changed:
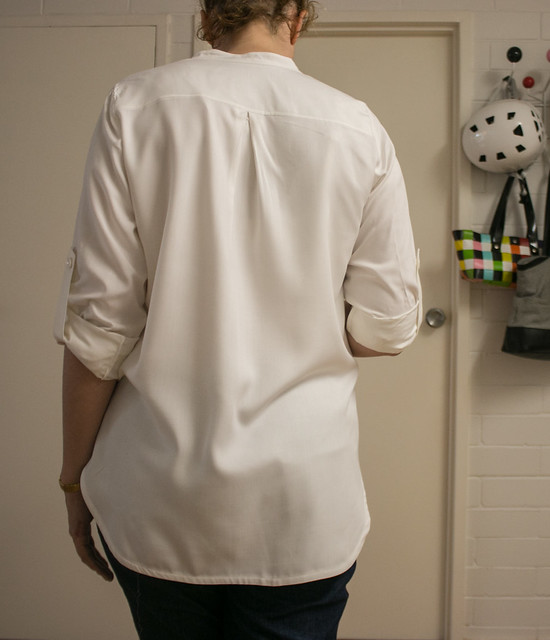
Possibly because I was the smallest cup size, I found when I went to gather the front top shoulder seams into the yoke, as in the instructions, there was actually no excess fabric to gather. I'm not bothered, I think I actually prefer it flat anyway.
Instead of sewing up the sleeves before setting them in, I set the sleeves in flat then French seamed the sleeves and shirt side seams up altogether.
I have never managed to get a decent narrow hem on a curve so I didn't even try, and hemmed the whole shirt with bias tape. Even now I can still see some bubbling, although it has reduced with pressing.
Once I tried the shirt on I realised how long the placket was, and decided to pin it closed, double-check that I could still get it on and off then top stitched it closed. The buttons are just sewn onto the lower half of the placket.
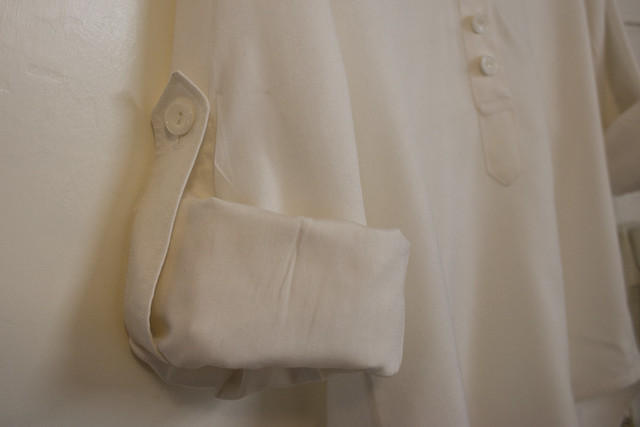
The sleeves are finished with cuffs and a bound placket, but I think I will always wear this with the sleeves rolled up and the tabs buttoned.
One tip I would give anyone planning to make this shirt is to decide how you want to wear the sleeves. If you think you might prefer wearing the sleeves unrolled, then consider skipping the tab as they are quite bulky and flappy under the shirt if not in use.
Overall, a very satisfying project and as with all patterns I love, I'm already planning the next one.


Comments
Post a Comment